Archive | May 2012

12 Secrets to Shopping at Farmers Markets

It is officially the beginning of Farmers Market season.  With the unseasonably warm winter, many fruits and vegetables have hit their peak performance weeks ahead of schedule.  If you are like me, you have been impatiently waiting on this unofficial start of the summer cooking season.  Here are 12 secrets to making the most out of your Farmers Market trip.

1. Stop by the info booth – Most markets will have a special booth with information, maps, recipes and other helpful information. Ask if they have specialty areas such as a designated organic area for vendors who sell Certified Organic produce.

2. Take your time – Shopping at a farmers market should be a pleasure not a chore. Carve out a couple of hours to stroll around, talk to vendors, and taste samples.

3. Look around – Never buy from the first vendor that you see, no matter how good the produce looks. Take time to look around and see all of your options before buying. You can always go back to that first vendor.

4. Dirt is your friend – Remember most of this produce is fresh from the fields of nearby farms. They have not been waxed and polished to catch the eye of bulk buyers like the produce at your grocery store. Also, this produce has likely been harvested ripe and taken directly to market. Your grocery store produce has likely been harvested weeks before their ripeness to withstand the rigors of transport and then gas ripened. So, if you see a little dirt, a few bumps and blemishes here and there or a couple of bugs, remember that this is actually a good thing!

5. If it looks perfect be wary – By the same token, produce that looks so perfect it could be made of wax, may well have been shipped in from a factory farm. It takes years of development and genetics, not to mention gallons of chemicals and byproducts to make fruits and vegetables look that perfect. If the produce appears to have a waxy coating, this may also be a sign that it was not locally grown. (I will have more on Wax Coating later)

6. Ask questions – While most vendors sell produce they have grown themselves, some do buy from local farmers and resell the produce and others may even buy from farms in other states just like grocery stores. Be sure to ask where the food came from. Most vendors will be honest.  Other question you may want to ask: How to prepare an unfamiliar item. Is the produce organic? When was it harvested? Where did it come from? What is the exact name of the variety (there are literally hundreds of different types of tomatoes, each with their own unique qualities)?

7. Sample – Never be afraid to ask for a sample. Some vendors may welcome you to sample, some may decline, but sampling is always the best way to judge the quality of produce.

8. Cost – Do not be surprised if the cost of some items is a few cents more than your neighborhood grocery store. Most groceries make around $0.20 margin on produce. They count on volume of sale for their overall profit margins. Local farmers do not have the same sales volume as grocers or factory farms, so they have to sell their produce at slightly higher prices. But remember, you are not only supporting your local farms and your community, but you are also feeding your family higher quality foods and that is well worth a few more cents.

9. Go often – The greatness of Farmers Markets in that the food is fresh. Take advantage of this and go once ever week or so. By all means buy extra to freeze or can, but save it up for the winter months when you can not buy farm fresh produce.

10. Relationships – One of the best things about Farmers Markets is the relationships that you build with the farmers who grow the food you feed your family. They know (or should know) almost everything about the produce they offer.  Take advantage of this.  Let them educate you, find out when they will have the best stuff, check out their other offerings.  Remember, you are building relationships with the men and women who produce the food you feed your family.

11. Be loyal – Once you have developed a relationship with vendors that you trust and who sell quality produce, learn their names (or at least the names of their farms), know when they will be at your local market and make sure to continue to shop with them. Your loyalty should be amply rewarded and they will take care of you.

12. Not Just for Produce – Farmers Markets are not just for fruits and vegetables. You can also buy locally raised (preferably grass fed) meats, and local cheeses, milk, eggs, jellies and jams, honey and much more. The same rules above also apply to these vendors as well.

Happy Shopping and SEE YOU AT THE FARMERS MARKET!!!

Heavenly Pumpkin Mini Cakes

.
These go well beyond muffins to become truly light, fluffy and moist mini cakes.  They make a fantastic desert and a great quick and easy breakfast for your family to grab on their way out the door in the morning.
.
Difficulty: Easy * Preparation Time: 15 Min * Cook Time: 30-35 Min * Makes: 24-28 mini cakes
.

Ingredients:

.

15-ounce can pumpkin

4 eggs

1 and 2/3 cups granulated sugar

1 cup vegetable oil

2 cups all-purpose flour

2 teaspoons baking powder

2 teaspoons ground cinnamon

1 teaspoon salt

1 teaspoon baking soda

1/2 teaspoon nutmeg, optional

.

Preparation:

.

Preheat the oven to 350 degrees F.

Using an electric mixer at medium speed, combine the pumpkin, eggs, sugar.  Slowly add oil until light and fluffy. Sift together flour, baking powder, cinnamon, nutmeg, salt and baking soda. Add the dry ingredients to the pumpkin mixture and mix at low speed until thoroughly combined and the batter is smooth.

Using a spoon or a ladle, fill muffin tin 1/2 to 2/3 full with batter.  Bake 30-35 minutes until tops are a rich deep pumpkin color and a toothpick inserted in the center comes out clean.

.

CREAM CHEESE FROSTING:
If you like a bit more sweetness, cream together cream cheese, powdered sugar and a splash of vanilla extract.

Old Fashioned Salmon Patties

This is the first meat dish that I have cooked in 20+ years and I have to thank Roberta, Carolyn, Shan and Julie for all of their help in making this recipe turn out well!  If you have never make salmon patties, do not panic (as I did…I almost threw out the can and scrapped the recipe) when you open the can and see skin and small bones mixed with the meat.  You can choose remove the skin if you like.  However, the skin and the bones are very tender and perfectly edible.  I simply flaked everything together and it turned out beautifully.  I served these salmon patties with Old Fashioned Corn Fritters for a great southern comfort food dinner.

.
Difficulty: Moderately Easy * Preparation Time: 15 Min * Cook Time: 15-20 Min * Servings: 2-4
.

Ingredients:

.

1 can Salmon

1 egg (I used Egg Beaters)

1 teaspoon flour

3-4 tablespoons corn meal

1 Tablespoon onion, minced (or 1/8 teaspoon onion powder)

Generous pinch salt and pepper

1 teaspoon lemon juice, optional

.

Preparation:

.

In a medium flake the salmon with a fork, smashing and combining everything including any skin and small soft bones.  Add the egg, flour and corn meal and combine well with a fork.  It should be very moist and hold its shape well when formed into a ball.  If the salmon begins to crumble, simply add a bit more egg.

Add vegetable or peanut oil to medium or large sized skillet and heat over medium-high heat.  To easily test the oil temperature, run your hand lightly under water, stand back from the stove and gently fling a few drops of water into the skillet.  If the oil cracks and sizzles, its hot enough.

Form the mixture into a small meat-ball sized ball and pat to flatten. Carefully place into skillet and cook 3-5 minutes on each side.  They should be a light golden brown.  Drain on paper towels.

Old Fashioned Corn Fritters

These corn fritters are a great southern staple.  While they may not be a treat you want to serve everyday, they are an incredible comfort food.  I had a craving for them this week and decided to served them with Old Fashioned Salmon Patties.  You can’t get more southern than this!

.
Difficulty: Easy  *  Preparation Time: 15 Min  *  Cook Time: 15-20 Min  *  Servings: 4-6
.

Ingredients:

Old Fashioned Corn Fritters

1 cup sifted all-purpose flour

1 teaspoon baking powder

1 teaspoon baking powder

1/2 teaspoon salt

1/4 teaspoon white sugar

1 egg, lightly beaten

1/2 cup milk (I used Silk® Vanilla Soy Milk)

1 tablespoon butter, melted (You can use margarine or shortening)

1 (12 ounce) can whole kernel corn, drained

.

Preparation:

Heat an inch or two of oil in a heavy pot or deep fryer.

In a medium bowl, combine flour, baking powder, baking soda, salt and sugar. Add egg, milk, and melted butter and combine well.  Mix in the corn kernels.

Drop fritter batter by teaspoonfuls into the hot oil.  Fry until golden brown on both sides. Turn them over if necessary.  Drain on paper towels.

Note: The batter will puff up while cooking

Sundried Tomato Spaghetti & (Veggie) Meatballs

This is a super quick and easy solution for a midweek family meal.  Using shelf staples, this was my Tuesday night solution to putting off a trip to the grocery store.  Paired with Parmesan Garlic Biscuits it was a wonderful meal that was ready in minutes. The recipe is very forgiving and easily adjustable depending on how many mouths you have to feed.

This recipe used Morningstar Farms® Meal Starter® Veggie Meatballs simply because they were in my freezer.  In future posts, I will be showing you how to make delicious, homemade vegetarian meatballs that can be easily made ahead or frozen.  This recipe can easily be made with beef or pork meatballs, or simply leave off the meatballs entirely for a simple and delicious pasta.

.
Difficulty: Easy  *  Preparation Time: 15 Min  *  Cook Time: 15-20 Min  *  Servings: 2-6
.

Ingredients:

.

1 Box Spaghetti Noodles (depending on how many mouths you are feeding)

1 Box Morningstar Farms® Meal Starter® Veggie Meatballs

1 Jar Sundried Tomato Spread

1 Can Diced or Crushed Tomatoes

Olive Oil

.

Preparation:

.

Prepare Veggie Meatballs according to package instructions (bake as 350 degrees for 15-18 minutes).

In a large pot, add generous amount of salt and a splash or olive oil to water and  add noodles.  Boil until al dente, about 10-15 minutes.  Drain and place back into pot or a large serving bowl.

Add sundried tomato paste, can tomatoes, and drizzle of olive oil.  Toss until combined well combined.  Add meatballs and give a gentle toss to coat.  Serve.

Parmesan Garlic Biscuits

This is an easy addition to any midweek dinner. Pair with Sundried Tomato Spaghetti & Meatballs and you have an wonderful family meal that is ready in minutes.

.
Difficulty: Easy  *  Preparation Time: 5 Min  *  Cook Time: 10-15 Min  *  Servings: 10-14
.

Ingredients

.

Biscuits:

2 Cups Bisquick Mix

2/3 Cup Milk (I used Silk® Vanilla Soy Milk)

1/2 Cup Parmesan Cheese

.

Topping:

1/4 Butter or Margarine, melted

1/4 Teaspoon Garlic Powder, to taste

1/4 Teaspoon Parsley, to taste

.

Biscuit Preparation:

In medium bowl, mix together Bisquick, milk and cheese.  Combine well, until it forms the consistency similar to a non-sticky bread dough.  Bake at 350 for 12-15 minutes or until tops form a firm non-doughy crust.  Note: The tops will do not brown.

.

Topping Preparation:

In small bowl combine butter, garlic powder and parsley.  Brush onto warm biscuits as soon as they have been removed from the oven.  Serve.

Old Fashioned Hershey Chocolate Pie

.

An easy and satisfying solution to any chocolate craving.  This rich, silky chocolate pie will be a hit with your family and friends.

.

Difficulty: Easy  *  Preparation Time: 15 Min  *  Cook Time: 0 Min  *  Servings: 20

.
.

Ingredients


Crust:
Graham Cracker Crumbs

Sugar

Butter (or margarine)


Filling:

1/3 C. Butter or Margarine

6 Regular Size Hershey Bars (plain or almond)

1/2 C. Marshmallow Cream

2 Containers of Creamy Cool Whip (thawed)

Graham Cracker Crust

Chocolate Chips (option decoration)


Crust Preparation:

Mix graham cracker crumbs with butter until the crumbs stick together easily when lightly pressed. Add sugar to taste. Press a thick layer into bottom of pie pan to form a minimum of 1/4 thick crust.  Bake at 350 for 5-8 minutes.  Sit aside.


Filling Preparation:

.

In medium saucepan, melt butter. Add crumbled Hershey Bars and simmer until melted. Add marshmallow cream. Continue to stir until combined.

Remove from heat and stir in one container of Cool Whip.

Pour into crust and chill, until set, about 1 hour.

With a spatula or spoon top chilled pie with thawed container of Cool Whip. Add chocolate to decorate. Chill for 1 hour to set the Cool Whip topping.

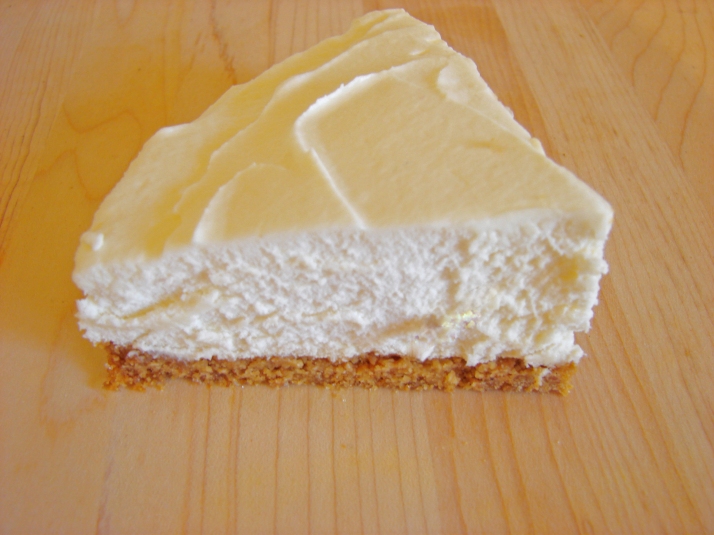
Easiest Fluffiest No-Bake Cheesecake Ever

This is a perfect desert to make during the week or as a last minute recipe.  It is quick and easy and your family and friends will think it took your hours to make!

.

Difficulty: Very Easy  *  Preparation Time: 15 Min  *  Cook Time: 0 Min  *  Servings: 8-10

.

Ingredients

.

Crust:

Graham Cracker Crumbs

Sugar

Butter (or margarine)

Filling:

1 Pint Heavy Cream

8 oz. Cream Cheese

1/2 to 2/3 C Sugar (depending on taste)
.
Crust Preparation:
Mix graham cracker crumbs with butter until the crumbs stick together easily when lightly pressed. Add sugar to taste.
.
Press into pie pan to form a minimum of 1/4 thick crust.  Bake at 350 for 5-8 minutes.  Sit aside.
.
Filling Preparation:
Whip the cream until peaks form.
.
Whisk together Cream Cheese & Sugar until creamy
.
Fold Cheese mixture and whipped cream together and pour into prepared crust.  Chill at least 1 hour

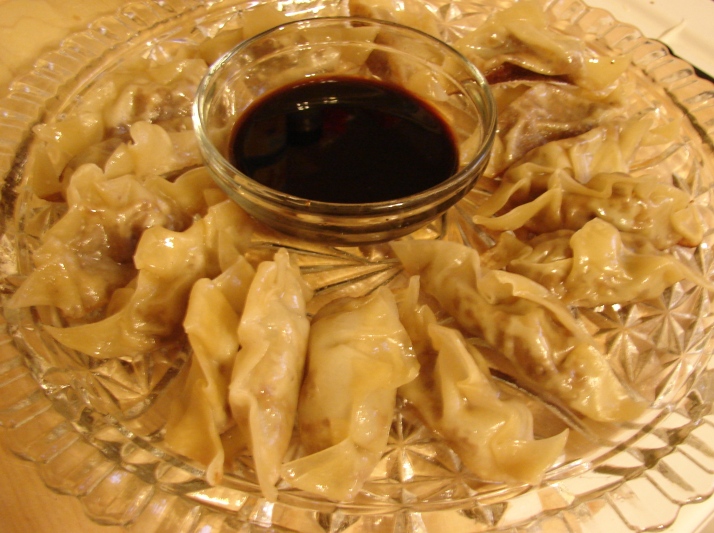
Best Ever (Vegetarian) Pan-Seared Dumplings

Dumplings, or pot-stickers, are a staple of many Chinese, Thai, and Japanese restaurant’s.  These are sure to surpass any you have tasted at a restaurant.  While this recipe is vegetarian, you can easily substitute the veggie meat for pork, chicken or beef.  While these are time consuming to make, they are not difficult.

.
Difficulty: Moderately Easy  *  Preparation Time: 45 Min  *  Cook Time: 15 Min  *  Servings: 8
.

Ingredients

.

2 cups MorningStar Farms® Meal Starters® Grillers® Recipe Crumbles™ (or your favorite type of veggie meat crumbles)

1.5 teaspoon soy sauce

2 teaspoon sesame oil

24 wonton wrappers

1/2 cup mild cheese of your choice (Parmesan, Provolone, Mozzarella, etc.), depending on taste

Peanut oil, for pan searing

Small bowl of water for wonton assembly

.
.

Preparation:

In a skillet with a few tablespoons of peanut oil, brown the veggie meat.

In a medium or large sized mixing bowl, combine browned veggie meat, soy sauce, sesame oil, and cheese.  Taste as you go to obtain the exact balance of flavors that appeals to you.

Place a small amount of the filling in the center of the wonton wrapper.  With your finger, lightly wet the edges of the wonton wrapper with water.  Fold the ends of the wonton wrapper together and press to seal.  Lightly rub the outside edge of the wrapper with more water and pleat. Once assembled, gently press the dumpling down on a flat surface to flatten the bottom.

Pour a small amount of peanut oil in a large pan with a lid and set the temperature to medium to medium high heat.  Place the dumplings in the pot, pointed side up and flat side down.  Be sure to fill your pan without over crowding.

Once the dumpling bottoms have obtained a nice golden brown color, approximately 1-2 minutes, carefully pour in 1/2 – 1 cup of water to the pan.  Use the pan’s lid to shield yourself from any splattering of hot oil.  Cover and allow to steam for 5-8 minutes or until they become slightly translucent.

.

Special Sauce:

1/4 cup soy sauce

Several splashes rice wine vinegar

1 teaspoon sugar

In a dipping bowl, mix together ingredients and serve.  Taste as you go to ensure the exact balance of flavors that appeals to you.

.

Tips:

  • These can be made ahead of time, refrigerated or frozen, and then cooked shortly before serving.
  • If you are making a large quality of the dumplings, be sure to cover them with a damp towel to prevent them from becoming dry during the assembly process.
  • If you do not have a large or extra large pan, you can easy cook these in a smaller pan, simply cook them in smaller batches.
  • If you want to reduce the oil in your diet, steam these dumpling rather than pan searing.

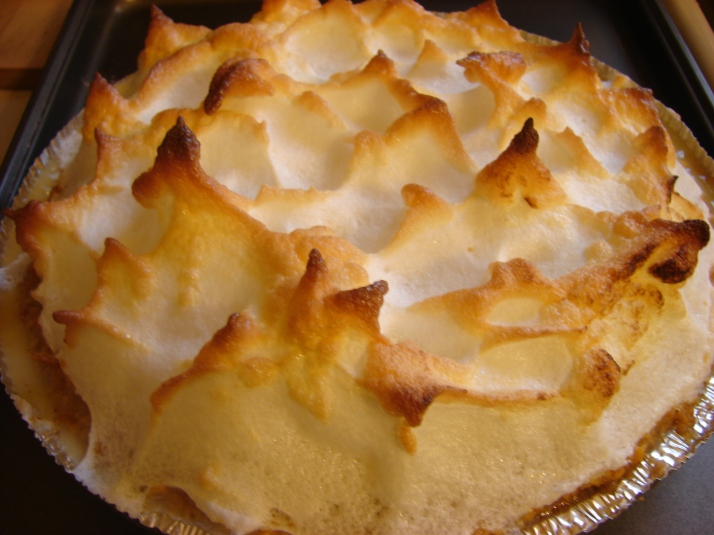
Nanny’s Old-Fashioned Lemon Meringue Pie

This easy and completely made-from-scratch Lemon Meringue Pie is the single most requested desert to come out of my kitchen.  It will surely be the only lemon pie recipe you will ever use!
.
Difficulty: Easy  *  Preparation Time: 30 Min  *  Cook Time: 10 Min  *  Servings: 8
.

Ingredients

.

Crust:
Graham Cracker Crumbs
Sugar
Butter (or margarine)

Filling:
2 Cans Eagle Brand Condensed Milk
3-5 Lemons (depending on how much you like lemon)

Meringue:
4-6 Large Eggs
1/8 Tsp. Lemon Juice per Egg (you can substitute cornstarch of you prefer)
1/8 -1/4 C. Sugar (Add more or less depending on taste)

Crust Preparation:

Mix graham cracker crumbs with butter until the crumbs stick together easily when lightly pressed. Add sugar to taste. Press into pie pan to form a minimum of 1/4 thick crust.  Bake at 350 for 5-8 minutes.  Sit aside.

Filling Preparation:

Squeeze lemons, making sure to strain out any seeds or pith.

In a large mixing bowl, combine condenses milk with lemon juice and pour into prepared crust.

Meringue Preparation:

Separate eggs and pour the egg whites into a large bowl w/lemon juice and sugar. Beat until stiff peaks form. (Stiff peaks are defined by peaks that keep their form when you remove the beater blades.)  Make sure not to over beat.

Using a spatula, coat the pie with a thick layer of meringue, leaving at least one cup in reserve. It does not have to be pretty, just evenly coated.

Using your hand, take globs of the meringue and press them gently into the meringue coating, pulling up to leave generous curls.

Use a kitchen butane torch to obtain the caramelized peaks.  The peaks will catch fire, but do not panic, simply blow them out like birthday candles.  If you do not have a butane torch, place the pie into a preheated broiler.   Watch very carefully as the meringue will go from perfect to burnt in a matter of second.


Tips:

  • Place lemons in the microwave for 30 second immediately before squeezing to  generate more juice.
  • Cold eggs separate better but room temperature eggs make a better meringue. The solution is to separate the eggs immediately after removing from the refrigerator and then allow them to rest for 10 minutes until they have come to room temperature.
  • On most electric stoves the “broiler” is a setting found on the temperature dial. You may need to move the top rack to a higher shelf notch.  On gas stoves the broiler is often found in a drawer at the bottom of the stove.